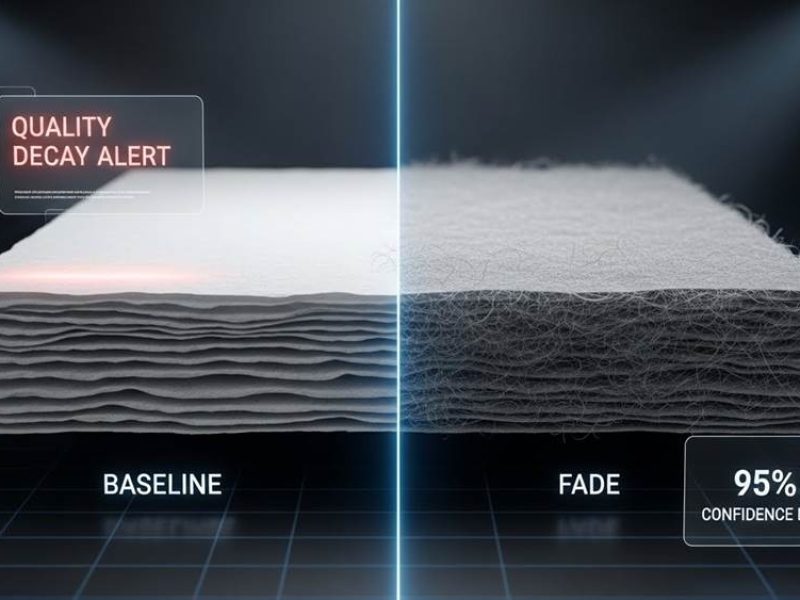
When you order 100 containers of tissue, the biggest risk isn’t a single defective batch—it’s the slow, invisible decline known as quality fade. This gradual shift in softness and bulk often bypasses standard inspections, leaving buyers with sub-par products that no longer match the original technical baseline.
This guide details how to maintain batch-to-batch consistency by anchoring production to physical Golden Samples and real-time data. We analyze the use of Tissue Softness Analyzers to detect surface friction changes and explain why ISO 2859-1 sampling protocols—which use 60-case samples to reach a 95% accuracy threshold—protect high-volume global exports from specification drift.
What is “Quality Fade” in the Tissue Industry?
Quality fade is the slow, incremental reduction in a product’s specifications to cut manufacturing costs, often going unnoticed during routine inspections. In the tissue industry, this manifests as a gradual decline in softness, absorbency, and bulk as suppliers substitute premium fibers or adjust refining processes over time.
Defining Gradual Specification Drift and Cost-Cutting Substitutions
Suppliers often incrementally reduce the ratio of premium fibers, such as Northern Bleached Softwood Kraft (NBSK), to lower operational costs without triggering immediate quality rejections. This practice leads to batch-to-batch variations where the final output slowly deviates from the original technical baseline established at the start of a contract. Because the changes occur in small increments, they frequently bypass standard quality control checks that look for major defects.
Unlike catastrophic failures, quality fade involves subtle shifts in formation and creping uniformity. These changes degrade the Hand Feel (HF) index over multiple production cycles, making the degradation difficult to spot without high-precision testing. Manufacturers may also adopt suboptimal refining conditions that increase fines and decrease dewatering efficiency to save energy, which sacrifices the bulk and tactile softness of the final tissue product.
Technical Indicators: Monitoring Freeness and TSA Hand Feel Metrics
The Tissue Softness Analyzer (TSA) serves as a primary tool for detecting these shifts. It measures the Hand Feel (HF) index using eight paddles and the Coefficient of Friction (COF) method to identify changes in surface friction and bulk deformation. Maintaining optimal freeness levels, typically at 500ml CSF or 25°SR, prevents densification and preserves the high bulk required for premium toilet and facial tissues.
Technicians monitor pulp freeness and fiber bonding to ensure the softwood content—which varies between 10% and 60% based on the product grade—matches the original specifications. While structured drying technologies like Through-Air Drying (TAD) and NTT help maintain softness, quality fade frequently manifests as a move toward high-density, lower-cost fiber alternatives. Rigorous testing of tensile strength and elastic deformation identifies specification drift early and ensures compliance with ISO 9001 and FSC standards.
Setting Technical Baselines: GSM, Tensile, and Softness
Technical baselines like GSM and tensile strength provide objective benchmarks to prevent quality fade. By defining specific weight ranges and load-bearing capacities, manufacturers ensure every production run in 2026 meets exact specifications, maintaining consistency across high-volume global exports and diverse product tiers.
Quantitative Metrics for Tissue Grade Consistency
GSM (grams per square meter) establishes the weight and density baseline, directly impacting the absorbency and thickness of toilet paper and facial tissues. Precise weight control ensures that product tiers remain distinct, preventing the material thinning that often occurs during high-volume scaling.
Tensile strength measures the maximum force paper fibers withstand before rupture. This metric is critical for the performance of high-capacity jumbo rolls used in industrial settings. Engineers focus on both machine-direction and cross-direction strength to guarantee the paper remains functional under tension.
Softness metrics integrate fiber length and ply count to provide a reproducible standard for user comfort across different market segments. By quantifying surface friction and bulk, manufacturers replace subjective hand-feel with data-driven profiles that remain stable across multiple production cycles.

Testing Protocols and Performance Data
ASTM standards guide the use of universal testing machines to quantify load-bearing capacity and seam strength for multi-ply products. These standardized protocols allow quality assurance teams to detect minute variances in fiber bonding before products leave the factory floor, ensuring structural integrity is never compromised.
Manufacturing lines monitor GSM thresholds in real-time to prevent material thinning during the production of 2,860 tons of paper per month. Sensors on the line provide constant feedback, allowing for immediate mechanical adjustments that maintain batch-to-batch reliability even at peak output speeds.
Mechanical hand-feel testing replaces subjective assessments to ensure 100% virgin wood pulp maintains consistent softness in 2026 production cycles. Using specialized equipment to measure the compressibility and surface smoothness of the tissue ensures that premium lines meet retail expectations without deviation.
The Role of “Golden Samples” in Long-Term QC
Golden samples serve as the permanent, sealed reference standard for all production batches. By maintaining identical copies with the buyer, supplier, and third-party inspectors, manufacturers ensure objective comparison during AQL testing, which prevents quality fade and material drift over years of supply.
| QC Component | Management Protocol | Quality Function |
|---|---|---|
| Golden Sample | Dated and sealed copies at three locations | Permanent arbiter for batch acceptance |
| Boundary Sample | Stored on-site with master sample | Defines limits of acceptable tolerance |
| AQL Sampling | Random selection from monthly production | Statistical verification of batch drift |
Establishing Physical Benchmarks for Product Continuity
Manufacturers maintain dated and sealed golden samples across three strategic locations: the buyer’s office, the manufacturing facility, and the third-party inspection firm. This distribution network ensures that every stakeholder references the same physical standard during every stage of the lifecycle. Once a sample receives formal approval, strict protocols prohibit post-approval modifications to tooling or material composition. This keeps the reference as the definitive arbiter for quality throughout the contract duration.
This system functions as an institutional memory device. By relying on a physical object rather than subjective descriptions, teams eliminate the ambiguity often found in written specifications. This approach aligns with ISO 9001 compliance by providing a verifiable and reproducible benchmark for every audit. Consistency remains the priority, ensuring that the final unit produced in 2026 matches the original approved prototype.

AQL Methodology and the Use of Boundary Samples
Quality assurance teams apply AQL (Acceptable Quality Level) methodology to evaluate high-volume production batches. During 2,860-ton monthly production runs, inspectors pull random units and compare them directly against the golden sample. This technical comparison identifies subtle variations that might pass a cursory glance but fail when held against the master reference. Boundary samples further refine this process by demonstrating the extreme limits of acceptable tolerance for specific metrics like thickness, GSM, and tensile strength.
Using these samples helps teams detect color drift and dimensional creep that frequently emerge during extended production cycles. Without a physical golden sample, small incremental changes in raw materials or machine calibration can lead to significant quality fade over several months. Anchoring the inspection process to a physical standard protects both the buyer and the supplier by establishing clear, contractually-binding visual and functional expectations for every shipment.
Build Your Premium Toilet Paper Brand with Global OEM Experts

In-Process Inspection: Monitoring the Converting Line
In-process inspection utilizes high-speed sensors and line scan cameras to monitor web tension, coating thickness, and defect detection at speeds up to 2,000 feet per minute. By integrating real-time metrology with +/-3% accuracy, manufacturers identify deviations instantly, ensuring batch-to-batch consistency and minimizing material waste across high-volume converting lines.
Real-Time Defect Detection and Web Control
High-speed converting lines utilize line scan cameras to identify surface defects while the web travels at speeds reaching 2,000 feet per minute (600 meters per minute). These imaging systems capture high-resolution data to detect microscopic tears or contaminants that occur during the plying and embossing stages. Edge position sensors and tension control modules work in tandem to prevent material misalignment, ensuring the tissue layers remain perfectly stacked as they move through the machinery.
Smart cameras monitor specific attributes such as perforation quality and roll diameter to ensure each unit meets the strict dimensions required for 40-foot high-cube container orders. These automated systems trigger immediate alignment adjustments when they detect a drift, which keeps waste levels at a minimum during high-volume production cycles. By controlling web integrity in real-time, operators maintain a continuous flow without the need for manual sampling that would otherwise slow down the line.
Technical Metrology and Precision Standards
Precision benchmarks require coating thickness and lotion application verification with +/-3% accuracy using NIST traceable standards. Metrology tools cover a range from 0.2 to 250 microns, providing the granular data necessary for high-end tissue products. In-line probes capture 150 measurements per second to maintain GSM stability across 2,860 tons of monthly output, allowing for instant feedback on weight and thickness variations.
Laser micrometers and ultrasonic sensors evaluate ply-bonding strength and roll density without stopping the production line. These modular probes operate reliably in factory environments with temperature ranges between 0 and 55 °C, ensuring data accuracy despite the heat generated by friction and high-speed motors. The resulting metrics, delivered in microns, g/m², and lbs/ream, allow engineering teams to validate every roll against documented quality specifications before the product reaches the packaging stage.

Random Sampling Protocols for High-Volume Buyers
High-volume buyers utilize ISO 2859-1 standards and AQL benchmarks to maintain quality. A standard sample of 60 cases provides a 95% accuracy threshold, ensuring that production batches meet specific technical requirements with a 90% confidence level before global distribution.
| Quality Metric | Acceptance Standard | Technical Rationale |
|---|---|---|
| Base Sample Size | 60 Cases | Optimizes the ratio of statistical accuracy to inspection time. |
| Accuracy Threshold | 95% Benchmark | Establishes the minimum performance level for batch consistency. |
| Rejection Limit | 3+ Exceptions | Defines the point where deviations indicate systemic failure. |
| Confidence Level | 90% Certainty | Guarantees reliable detection of batches failing to meet standards. |
Statistical Benchmarks and ISO 2859-1 Standards
Quality control protocols adhere to ISO 2859-1 international standards for determining sample sizes based on total lot dimensions and the Acceptance Quality Limit (AQL). A 60-case sample serves as the optimal benchmark for balancing statistical accuracy with efficient inspection workflows. Inspection teams apply a strict 95% accuracy threshold, where three or more exceptions in a 60-unit sample trigger an immediate batch rejection. These benchmarks maintain a 90% confidence level to detect system failures, ensuring that production processes with high true accuracy consistently pass while catching significant errors before shipment.
Sampling Methodologies for Bulk OEM Shipments
OEM shipments involving diverse product specifications within a single 40’HQ container require stratified random sampling. This method verifies consistency across different GSM weights, ply counts, and dimensions. Quality auditors deploy single, double, or multiple sampling plans based on the criticality of the product and the complexity of the converting line. For smaller production runs below 1,200 cases, finite population correction adjusts the sample size to maintain precision without excessive volume. Integrating AQL levels into real-time audits helps teams distinguish between isolated minor deviations and systemic manufacturing failures.
Managing Raw Material Shifts (Changing Pulp Suppliers)
Managing pulp transitions in 2026 centers on comparing new raw materials against established technical baselines. By auditing fiber length, brightness, and freeness, manufacturers prevent production waste and ensure that shifts in the supply chain do not degrade the softness, strength, or purity of the final tissue product.
Material Validation Protocols for Quality Alignment
Quality assurance teams audit fiber length to ensure it stays within the 1-5 mm range required for optimal strength and surface smoothness. This validation step confirms that new materials provide the necessary structural integrity for the end product. Technicians also verify that brightness levels meet the 80-90% benchmark standard for premium tissue and paper applications to satisfy market expectations for high-end aesthetics.
Maintaining strict purity standards of fewer than 5 defects per 10,000 m² prevents holes or spots in high-grade packaging materials. In segments like high-purity dissolving pulp, engineers align alpha-cellulose content with specific customer requirements to maintain profitability and meet year-round technical specifications.
Technical Benchmarks for Process Stability and Yield
Operators monitor freeness levels between 350-450 mL to maintain drainage speed and sheet formation consistency across the production line. Maintaining slurry density at 0.5-0.6% consistency is essential to avoid the 45% waste rate typically associated with poor batch uniformity. These tight controls ensure the production environment remains stable even as the source of raw fiber changes.
Lab teams test incoming pulp viscosity against a 15-20 centipoises range to guarantee fiber durability throughout the converting process. To further optimize costs and efficiency, mills implement automated dosing and pH loops in bleaching lines. These systems target a 23% reduction in chemical waste during material transitions by providing real-time control over additives and slurry formation.
Corrective Action Reports (CAR) for Quality Deviations
A Corrective Action Report (CAR) serves as a formal document to identify, analyze, and eliminate the root causes of quality deviations in paper manufacturing. By following ISO 9001:2015 Clause 10.2, manufacturers move beyond quick fixes to implement sustainable process improvements that prevent batch-to-batch inconsistencies and maintain retail standards.
Identifying Root Causes Through ISO Standards
Manufacturing facilities use the framework provided by ISO 9001 Clause 10.2 to ensure every nonconformance is documented and analyzed systematically. This reporting process moves beyond identifying a defect by requiring a deep dive into variables like pulp contamination, machine speed fluctuations, or operator deviations from standard operating procedures. Quality teams employ analytical tools such as the 5 Whys and Fishbone (Ishikawa) Diagrams to peel back layers of causation. Furthermore, Failure Mode and Effects Analysis (FMEA) allows managers to assess the severity and probability of specific failures, ensuring that high-risk deviations receive immediate technical intervention and resource allocation.
Action Implementation and Performance Tracking
Resolving quality failures requires the development of SMART-based action plans that assign clear ownership, specific deadlines, and necessary budget allocations for equipment repairs or process updates. While long-term solutions are being engineered, immediate containment protocols—such as batch isolation, warehouse holds, or product recalls—protect the supply chain from defective tissue products. The final stage of the CAR process involves verifying the success of these measures by comparing post-implementation defect rates against historical baselines. This data validation ensures the root cause is fully neutralized, allowing for formal closure of the report and providing a transparent audit trail for retail partners and regulatory bodies.
Final Thoughts
Manufacturers protect product integrity by shifting from subjective assessments to data-driven standards. Using tools like the Tissue Softness Analyzer and real-time sensors ensures every batch matches the original technical baseline. This systematic approach stops small, incremental changes from turning into significant brand-damaging defects over long-term production runs.
Relying on physical golden samples and strict AQL protocols builds a reliable bridge between the first container and the hundredth. These systems catch material shifts and mechanical drift before they impact the final user experience. Buyers who prioritize these technical safeguards secure a supply chain that withstands the pressures of high-volume manufacturing and changing pulp markets.
Frequently Asked Questions
How can buyers prevent quality fade over multiple production cycles?
Buyers should implement a multi-layered QA system that monitors raw materials and process conditions continuously. Industry leaders align with ISA-88 batch control standards to minimize human error and equipment drift. By requiring real-time process monitoring and lot-level certificates of analysis (CoA), buyers prevent the gradual degradation that leads to off-spec batches and significant margin erosion.
What defines a ‘Golden Sample’ and how is it managed?
A Golden Sample is the final, approved pre-production benchmark for mass production. It serves as the exact reference for paper weight, ply, and softness. The approval follows a three-stage process: supplier submission, customer approval, and production trigger. Factories store these samples in controlled environments to use as primary evidence during factory inspections or quality disputes.
What is the industry standard for sampling a 40HQ container?
Standard protocols for a 40HQ container require testing 1 in every 100 containers for structural items like floor strength and lifting. At the product level, factories conduct random sampling throughout the converting line to verify technical baselines, such as GSM and tensile strength, ensuring every batch meets the predefined specifications.
What are the most common causes of batch-to-batch inconsistency?
Inconsistency usually stems from ingredient variability, equipment calibration drift, and fragmented data systems. Research indicates that manufacturers without systematic batch management can face errors 4-5 times per day. When pulp purity drifts or manual documentation fails, the resulting variations in viscosity or texture compromise the final product quality.
How should a buyer resolve a quality dispute with a Chinese factory?
Buyers should first verify non-conformance against the manufacturer’s stated standards or Chinese national standards. Initial steps involve demanding repair or replacement. If the factory fails to comply, buyers can escalate the issue to the SAMR for administrative penalties or seek contractual remedies through CIETAC arbitration to resolve the dispute legally.
Does the manufacturer use the same pulp supplier for every order?
No. Factories select pulp based on market availability, sustainability, and cost to maintain consistent end-product quality. For 2026 production runs, the focus remains on achieving a 3% bone-dry pulp consistency. While suppliers may change, the manufacturing process adjusts process setpoints dynamically to ensure the final tissue performance remains uniform.


